There’s a profound satisfaction in connecting with traditions of generations past, especially when it involves stocking your pantry with wholesome, homemade food. Canning green beans is a timeless homestead skill that transforms a fleeting summer harvest into a year-round delight. When your garden bounty of crisp, tender beans starts overflowing, knowing how to can green beans safely and efficiently becomes an invaluable asset.
The gentle "ping" of a jar lid sealing shut is more than just a sound; it's a testament to your efforts, a promise of nutritious meals, and a deeply satisfying assurance that your family will enjoy fresh, local food long after the growing season ends. Having canned beans for years, we can attest: home-canned green beans boast a freshness and firmness that store-bought alternatives simply can't match, and you have complete control over every ingredient. Whether you’re a canning novice or just need a helpful refresher, this comprehensive guide will walk you through the process, ensuring a safe and successful journey to a well-stocked pantry.
Why Master Home-Canned Green Beans?
Beyond the simple act of preservation, learning how to can green beans offers a multitude of benefits that resonate deeply with modern homesteaders and home cooks alike. It's about more than just food; it's about flavor, control, and self-sufficiency.
- Unmatched Flavor and Texture: Home-canned green beans retain a vibrant freshness and a satisfyingly firm texture that often gets lost in commercial processing. They taste like they just came from the garden, a stark contrast to the often limp and bland store-bought varieties.
- Complete Ingredient Control: When you can your own beans, you know exactly what’s in each jar. No mystery additives, no excessive sodium – just pure, wholesome green beans, perhaps with a touch of canning salt if you choose. This transparency is invaluable for those with dietary restrictions or a desire for clean eating.
- Year-Round Enjoyment of Your Harvest: Imagine enjoying the taste of summer's peak produce in the dead of winter. Canning allows you to savor your homegrown (or locally sourced) green beans all year long, providing a consistent supply of delicious vegetables for your family.
- Cost Savings and Reduced Waste: Preserving a large harvest prevents spoilage and saves money in the long run. Instead of letting excess beans go to waste, you transform them into a valuable pantry staple, reducing your grocery bill and minimizing food waste.
- A Connection to Tradition: Canning is a skill passed down through generations, connecting us to a heritage of self-reliance and resourcefulness. There's an inherent pride in continuing these time-honored practices.
When selecting your beans, prioritize freshness and tenderness. While many varieties work well, we often opt for pole beans like Emerite, which offer a longer harvesting season and less back-bending work. Even "purple" varieties, such as Purple Podded Pole Beans, transform into classic green once cooked or canned, showcasing nature's delightful shifts.
Understanding Raw Pack vs. Hot Pack: Which Method is Right for You?
Before you dive into the canning process, you'll need to choose between two equally safe and approved packing methods for your green beans: the raw pack or the hot pack. Both methods deliver delicious results, but they differ in preparation and offer distinct advantages depending on your preferences and the size of your harvest.
Raw Pack Method
The raw pack method is often favored for its speed and simplicity, especially when dealing with a large influx of fresh beans. With this technique, freshly prepared green beans are packed directly into clean, room-temperature jars. Boiling water is then poured over the beans, leaving the appropriate headspace.
- Pros: It’s quicker and requires less pre-cooking time, making it ideal for busy canning days. You're handling cool beans rather than hot, potentially messy ones.
- Cons: Beans packed raw may shrink a bit more in the jar during processing, and their color might not be quite as vibrant as hot-packed beans.
Hot Pack Method
For the hot pack method, green beans are pre-cooked for approximately 5 minutes in boiling water before being transferred hot into jars. The cooking liquid is then used to fill the jars, again ensuring proper headspace.
- Pros: Pre-cooking helps to "shrink" the beans slightly before canning, allowing you to fit more into each jar and reducing post-processing shrinkage. It can also help to set their color and maintain a slightly firmer texture in storage.
- Cons: This method requires an extra step of cooking the beans, involves handling hot food and boiling liquid, and takes more time overall.
Both methods are safe and yield fantastic home-canned green beans, with the processing times remaining identical for either choice. Many experienced canners, including ourselves, lean towards the raw pack simply because it's less cumbersome to load jars with room-temperature beans rather than juggling hot beans and steaming liquid. The choice truly comes down to personal preference. For a deeper dive into the nuances of each method, you can explore our guide on Raw Pack vs. Hot Pack: The Easiest Way to Can Green Beans.
Essential Equipment for Safe Green Bean Canning
Successful and safe home canning hinges on having the right tools. Before you begin the process of how to can green beans, gather all your equipment. This ensures a smooth workflow, which is crucial once you start packing.
The Non-Negotiable: A Pressure Canner
This is the most critical piece of equipment. Green beans are a low-acid food, meaning they must be processed in a pressure canner. A boiling water bath canner does not reach temperatures high enough to destroy the Clostridium botulinum bacteria and its spores, which thrive in low-acid, oxygen-free environments. Using a pressure canner is paramount for safety. Ensure your pressure canner's gauge is accurate; it’s a good practice to have it checked annually by your local extension office.
Jars and Lids
- Canning Jars: Use only mason jars specifically designed for canning, in pint or quart sizes. Inspect them for any chips or cracks, which can prevent a proper seal. Wash jars thoroughly in hot soapy water and rinse well, or run them through a dishwasher. Keep them warm until ready to fill to prevent thermal shock.
- Two-Piece Lids: This includes new flat lids (which are single-use) and screw bands (which can be reused if not rusted or bent). Prepare the lids according to the manufacturer's instructions – some require simmering, while others do not.
Preparation and Handling Tools
- Fresh Green Beans: Aim for about 1 pound per pint jar or 1.5 pounds per quart jar. Choose tender, blemish-free beans, avoiding any with bulging seeds or tough pods.
- Canning Salt (Optional): If desired, use ½ teaspoon per pint or 1 teaspoon per quart. Do NOT use iodized table salt, as it can discolor your beans and make the canning liquid cloudy. Only use pure canning or pickling salt.
- Large Pot for Boiling Water: For filling jars (raw pack) or blanching beans (hot pack).
- Jar Lifter: Essential for safely placing hot jars into and removing them from the canner.
- Magnetic Lid Lifter: Helps to safely retrieve hot lids from simmering water.
- Ladle: For cleanly filling jars with hot water or cooking liquid.
- Hot Pads or Oven Mitts: For handling hot jars, lids, and the canner.
- Small Dishcloths or Paper Towels: Crucial for wiping jar rims clean before sealing. Any residue can prevent a proper seal.
- Chopstick or Thin Spatula: To remove air bubbles from packed jars.
- Large Bowl or Colander: For washing and draining beans.
Getting all these items ready before you start will make the canning process much smoother and more enjoyable, allowing you to focus on the task at hand.
Step-by-Step Guide: How to Can Green Beans Safely
With your equipment ready and your choice of packing method made, it's time to learn the precise steps for how to can green beans for a pantry full of wholesome goodness.
Step 1: Prepare Your Green Beans
- Wash Thoroughly: Rinse fresh green beans under cool running water. It's surprising how much dirt and debris can cling to them.
- Trim and Sort: Snap or cut off the ends of each bean. You can leave them whole for a "French-style" pack, or cut/snap them into 1-2 inch pieces. While snapping, pay attention to the texture; discard any beans that are tough, fibrous, or have bulging seeds, as these won't soften well during canning.
- Drain: Place the cleaned and trimmed beans in a colander to drain any excess water.
Step 2: Prepare Your Jars and Lids
- Clean and Warm Jars: Wash canning jars thoroughly with hot soapy water or run them through a dishwasher. Keep them warm until filling. This prevents cracking when hot liquid is added.
- Prepare Lids: Follow the manufacturer’s instructions for preparing your two-piece lids. Often, this involves simmering the flat lids in warm water (not boiling) to soften the sealing compound.
Step 3: Pack Your Jars (Using Raw Pack as an Example)
- Pack Beans: Tightly pack the prepared raw green beans into your warm jars, leaving 1 inch of headspace (the space between the top of the food and the rim of the jar). Don't force them in so tightly that liquid can't circulate.
- Add Salt (Optional): If desired, add ½ teaspoon canning salt to pint jars or 1 teaspoon to quart jars. Remember, this is purely for flavor, not preservation.
- Add Boiling Water: Ladle boiling water over the beans, maintaining 1 inch of headspace.
- Remove Air Bubbles: Use a chopstick or thin spatula to gently remove any trapped air bubbles by sliding it down the sides of the jar between the beans and the glass. Top off with more boiling water if necessary to restore the 1-inch headspace.
- Wipe Rims: Crucially, wipe the rims of the jars clean with a damp cloth or paper towel. Any food residue or grease can prevent a proper seal.
- Apply Lids and Bands: Center a warm, flat lid on each jar. Screw on the bands "fingertip tight" – just until resistance is met, no overtightening.
(For hot pack, pre-cook beans for 5 minutes, then pack hot beans into warm jars, cover with the hot cooking liquid, and proceed from step 4 above.)
Step 4: Process in a Pressure Canner
- Load Canner: Place the filled and sealed jars onto the rack in your pressure canner. Ensure there’s enough water in the canner according to your canner's instructions (typically 2-3 inches).
- Seal and Vent: Secure the canner lid. Turn the heat to high. Allow steam to escape steadily from the vent pipe for a full 10 minutes. This purges air from the canner, which is essential for accurate pressure.
- Achieve Pressure: Place the weighted gauge or close the petcock (depending on your canner type). Allow the pressure to rise to the recommended level for your altitude (typically 10 pounds for weighted gauge canners or 11 pounds for dial gauge canners at altitudes up to 1,000 feet). If you live at a higher altitude, consult your local extension office or USDA guidelines for specific pressure adjustments.
- Process: Once the correct pressure is reached, begin timing.
- Pint jars: Process for 20 minutes.
- Quart jars: Process for 25 minutes.
- Cool Down: Once processing time is complete, turn off the heat. Do NOT rush this step. Allow the canner to cool naturally until the pressure returns completely to zero. Forcing it open or cooling it rapidly can cause liquid loss from jars and unsafe seals.
Step 5: Final Steps and Storage
- Remove Jars: Once the pressure is at zero, carefully open the canner (away from your face to avoid steam) and use a jar lifter to remove the hot jars. Place them on a towel-lined surface, ensuring there is space between each jar for air circulation.
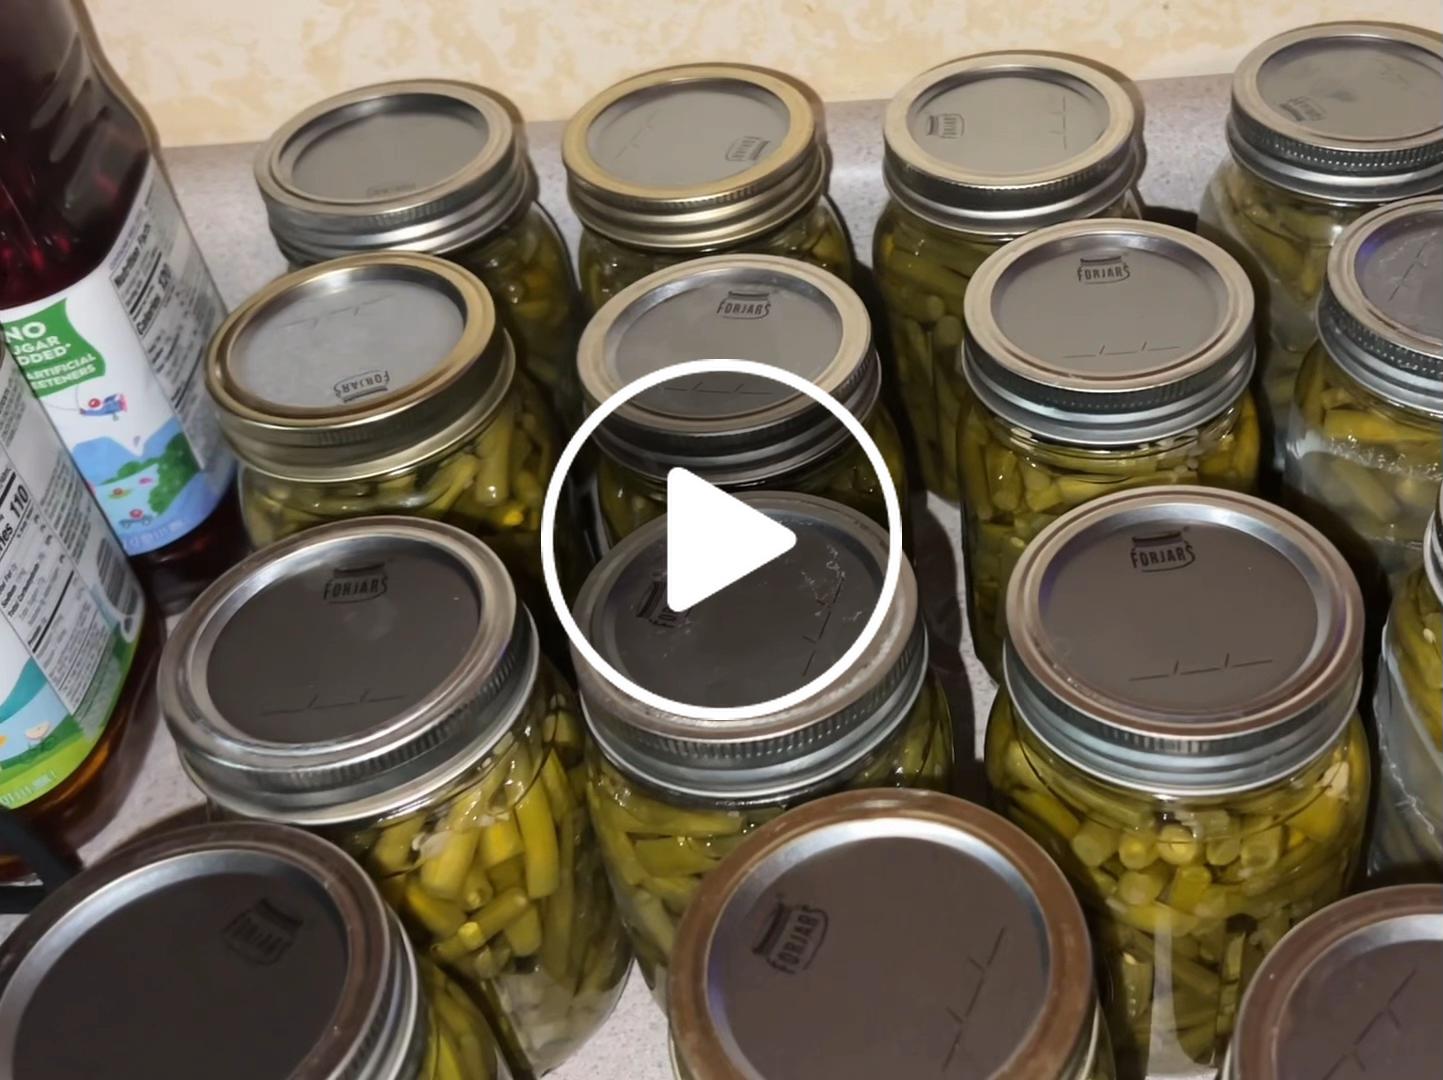
- Cool and Check Seals: Let the jars cool undisturbed for 12-24 hours. As they cool, you should hear the satisfying "ping" of lids sealing. After cooling, check seals by pressing the center of each lid. A properly sealed lid will be concave and won't flex when pressed. If a jar hasn't sealed, you can reprocess it within 24 hours with a new lid (after checking for issues that prevented sealing) or refrigerate and consume within a few days.
- Store: Remove the screw bands (they can loosen seals over time and rust). Wipe jars clean, label with the contents and date, and store in a cool, dark, dry place.
Tips for a Bountiful Pantry: Maximizing Your Green Bean Harvest
Successfully canning green beans is just one piece of the puzzle. To truly build a bountiful pantry, consider these additional tips:
- Harvest Regularly: For homegrown beans, pick frequently to encourage continuous production. Don't let beans get too large or tough on the vine.
- Batch Processing: Don't feel pressured to can all your beans at once. If your harvest comes in waves, process smaller batches. Even a few jars at a time add up!
- Mix Varieties: Experiment with different types of green beans. Some heirloom varieties offer unique flavors or textures, and planting a mix can help extend your harvest season.
- Shelf Life: Properly canned green beans can last for at least a year, often longer, though their quality may decline after that. Always follow the "first in, first out" rule for your pantry.
- Altitude Adjustments: Always double-check USDA or local extension office guidelines for pressure adjustments based on your specific altitude. This is a critical safety measure.
By following these steps and tips, you'll not only master how to can green beans but also gain immense satisfaction from contributing to your family's food security and culinary enjoyment. For more inspiration on building your home food stores, delve into our guide on Stock Your Pantry: Home-Canned Green Beans the Homestead Way.
Mastering the art of canning green beans is a truly rewarding endeavor. It bridges the gap between garden and table, provides a source of wholesome nutrition, and offers a profound sense of accomplishment. The simple act of reaching into your pantry and pulling out a jar of home-canned green beans is a reminder of your hard work and the delicious bounty of nature. With this comprehensive guide, you’re now equipped with the knowledge and confidence to safely preserve your green bean harvest and enjoy its fresh taste throughout the year. Happy canning!
