Unlocking the Secret to Easy Home-Canned Green Beans: Raw Pack vs. Hot Pack
There's a special kind of magic that happens in a home kitchen when the garden bounty is abundant. For many, that magic culminates in the rhythmic "ping" of canning lids, signaling a pantry stocked with wholesome, homemade goodness. Among the most cherished staples is the humble green bean. Learning
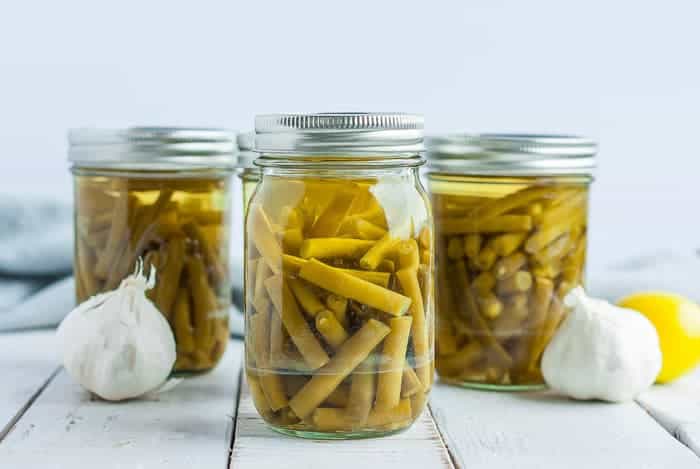
how to can green beans connects us to a timeless tradition, transforming fresh harvest into year-round enjoyment. Once you’ve savored the crisp texture and pure flavor of home-canned green beans, the store-bought variety simply pales in comparison. They’re fresher, firmer, and you have complete control over every ingredient.
But as you embark on this satisfying journey, a common question arises: should you use the raw pack or hot pack method? Both are safe and approved ways to preserve your beans using a pressure canner, but each offers distinct advantages. Understanding these differences will help you choose the easiest and most efficient approach for your kitchen and harvest size.
Raw Pack vs. Hot Pack: Choosing Your Canning Method for Green Beans
When it comes to
canning green beans, selecting your packing method is a foundational decision. Both raw pack and hot pack are safe, but they cater to different preferences and situations. Let’s explore each in detail to help you decide which is best for your canning adventure.
The Raw Pack Method: Speed and Simplicity
The raw pack method lives up to its name: you pack fresh, unprepared green beans directly into your canning jars at room temperature. Once the beans are in place, you cover them with boiling water or broth.
*
Advantages: The primary benefit of the raw pack method is its speed and ease. When you’re dealing with a large influx of green beans from the garden, minimizing steps can be a game-changer. There's no pre-cooking involved, which means less time over a hot stove and fewer hot items to handle. This efficiency makes it particularly appealing for busy canners.
*
Considerations: A common observation with raw packing is that the beans may shrink a bit more during processing, potentially leading to more empty space at the top of the jar or liquid loss. While perfectly safe, some prefer a fuller jar aesthetic. However, for sheer convenience, raw packing often wins. Many seasoned canners, myself included, opt for raw pack because it's simply easier to load room-temperature beans into jars without juggling hot produce and boiling liquid simultaneously.
The Hot Pack Method: Optimal Texture and Color
Conversely, the hot pack method involves a brief pre-cooking step before the beans enter the jars. Typically, green beans are blanched or simmered in boiling water for about five minutes. They are then packed hot into jars and covered with the hot cooking liquid or fresh boiling water.
*
Advantages: Pre-cooking helps the beans retain their vibrant color and slightly firmer texture during storage. It also allows the beans to "shrink" a bit before going into the jar, which can result in a more densely packed jar with less noticeable shrinkage during pressure canning. If you prioritize the visual appeal and a slightly superior texture, hot packing might be your preferred choice.
*
Considerations: The main drawback of hot packing is the additional time and effort involved. You’re adding an extra step of cooking the beans, and then you're handling hot beans and hot liquid, which requires more care and can slow down the overall process. This might be less desirable if you have a massive harvest to process or are sensitive to working with hot items.
Ultimately, the processing time in the pressure canner remains the same for both raw pack and hot pack methods for green beans. Your decision boils down to a trade-off between speed and convenience (raw pack) versus potentially better color and texture retention (hot pack). Both are safe, effective, and will yield delicious home-canned green beans.
The Non-Negotiable Necessity: Pressure Canning for Green Beans
Regardless of whether you choose raw pack or hot pack, there's one golden rule for
how to can green beans: you *must* use a pressure canner. Green beans are classified as a low-acid food, meaning they don't have enough natural acidity to prevent the growth of harmful bacteria, specifically *Clostridium botulinum*, at boiling water temperatures.
A pressure canner operates at temperatures significantly higher than boiling water (which reaches 212°F or 100°C at sea level). These elevated temperatures are crucial for safely preserving low-acid foods like green beans, meats, and most vegetables, by destroying any potential spores of botulism. Attempting to water bath can green beans is extremely dangerous and could lead to serious foodborne illness. Safety is paramount in home canning, so never skip or shortcut this essential step. For a comprehensive overview of safe canning practices, you might find this guide helpful:
Mastering Home-Canned Green Beans: A Safe Step-by-Step Guide.
Gathering Your Arsenal: Essential Equipment and Preparations
Before you even think about snipping your first bean, proper preparation is key to a smooth and successful canning experience. Getting all your equipment and ingredients ready ensures you can work efficiently, which is especially important once you start packing.
Here’s what you’ll need:
*
Fresh, Tender Green Beans: Aim for about 1 pound per pint jar or 1.5 pounds per quart jar. Look for firm, vibrant beans that snap easily. Avoid any that are bulging with seeds or feel tough. Interestingly, some "green" beans, like Purple Podded Pole Beans, actually turn green when cooked or canned! Our main crop, Emerite pole beans, are a favorite for their long production season and ease of harvest (less bending!).
*
Canning Jars: Clean pint or quart size jars with two-piece lids (new flat lids are essential for each batch). Keep your jars warm before filling to prevent thermal shock when adding hot liquid.
*
Pressure Canner: As mentioned, this is non-negotiable for safety.
*
Canning Salt (Optional): Use about ½ tsp per pint or 1 tsp per quart. This is purely for flavor and to help firm the beans; it's not essential for safety.
Never use iodized table salt, as it can cause discoloration and cloudiness.
*
Jar Lifter: For safely moving hot jars in and out of the canner.
*
Tongs or Magnetic Lid Lifter: To handle the hot lids and bands.
*
Ladle: For cleanly filling jars with boiling liquid.
*
Hot Pads/Oven Mitts: For handling all things hot.
*
Small Dish Cloths or Paper Towels: Crucial for wiping jar rims clean before sealing.
*
Chopstick or Thin Spatula: To release air bubbles from packed jars.
*
Headspace Tool: To ensure proper headspace.
Step-by-Step: Preparing Your Green Beans for the Jar
The journey to delicious home-canned green beans begins with careful preparation of the produce itself.
1.
Wash Thoroughly: Rinse your green beans under cool, running water. You'd be surprised how much dirt and debris can cling to them. A good wash ensures your beans are clean before processing.
2.
Trim and Snap/Cut: Trim off the stem and blossom ends of each bean. Then, you can either snap or cut them into 1-2 inch pieces, or leave them whole for a "French-style" presentation. I personally prefer snapping over cutting; it’s an intuitive way to identify if any beans are tough or overripe, as they won't snap cleanly. Discard any beans that feel stringy, look yellowed, or have overly mature seeds. These won't soften nicely in the jar.
3.
Drain: Once washed and trimmed, drain the beans thoroughly. If you're hot packing, this is when you'd proceed to blanch them for about 5 minutes, then drain again, reserving the cooking liquid if desired for filling jars.
The Canning Process: From Prep to Pantry
With your beans prepared and equipment ready, it's time to bring it all together.
1.
Pack the Jars:
*
For Raw Pack: Tightly pack the prepared, raw green beans into your warm, clean jars. Leave 1 inch of headspace.
*
For Hot Pack: Tightly pack the hot, blanched green beans into your warm, clean jars. Leave 1 inch of headspace.
2.
Add Salt (Optional): If using, add ½ tsp canning salt to pint jars or 1 tsp to quart jars.
3.
Add Hot Liquid: Ladle boiling water (for raw pack) or the hot blanching liquid/boiling water (for hot pack) over the beans, maintaining 1 inch of headspace.
4.
Remove Air Bubbles: Use your chopstick or thin spatula to gently work around the inside of the jar, releasing any trapped air bubbles. Re-adjust liquid level if necessary to maintain 1 inch of headspace.
5.
Wipe Rims: Use a clean, damp cloth or paper towel to wipe the jar rims thoroughly. Any food residue can prevent a proper seal.
6.
Apply Lids and Bands: Center a new, flat lid on each jar, then screw on the bands finger-tight.
7.
Load the Canner: Place the filled jars onto the rack in your pressure canner. Ensure there’s enough water in the canner according to your model’s instructions (usually 2-3 inches).
8.
Process: Secure the canner lid, bring it to a boil, and vent steam for 10 minutes. Then, add the weighted gauge or close the petcock and bring the canner to the recommended pressure for your altitude and jar size (typically 10 lbs for weighted gauge or 11 lbs for dial gauge, for quarts and pints). Process pint jars for 20 minutes and quart jars for 25 minutes.
9.
Cool Down: Once processing is complete, turn off the heat and allow the canner to depressurize naturally. Do NOT rush this process by opening the vent or cooling with water.
10.
Remove and Cool: Once the pressure gauge reads zero, wait another 5-10 minutes, then carefully remove the lid. Let the jars sit in the canner for 5-10 minutes before carefully lifting them out with a jar lifter and placing them on a towel-lined counter to cool undisturbed for 12-24 hours.
11.
Check Seals: After cooling, check that all lids have sealed (the center should be concave and not flex when pressed). Remove bands, wipe jars clean, label, and store in a cool, dark place. For more tips on storing your harvest, check out:
Stock Your Pantry: Home-Canned Green Beans the Homestead Way.
Conclusion
Learning
how to can green beans is an incredibly rewarding skill that transforms your harvest into pantry gold. Whether you lean towards the quick efficiency of the raw pack method or the texture benefits of the hot pack, both offer a safe and delicious way to enjoy garden-fresh green beans all year round. The satisfaction of hearing those lids "ping" and seeing your shelves filled with homemade food is unparalleled. So, gather your beans, fire up your pressure canner, and embrace the deeply satisfying tradition of home canning. Your future self (and your taste buds!) will thank you.